Tuesday, 13 October 2009
Tuesday, 6 October 2009
Skining Underway
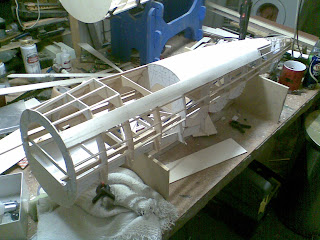
This could be the last post for a few weeks judging on how long it took to add the skin shown on the photo below. Sanding and shaping every piece is a little time consuming, but on the bright side the joints so far are perfect with no gaps.  Dave's Bearcat is ahead in the skining department and is looking good.

 Dave's Bearcat is ahead in the skining department and is looking good.
Thursday, 1 October 2009
Stringers in
Most of the stringers are now in. The most time consuming part of mondays building session was to install the pushrods for the elevator and rudder before putting the stringers in place. However both are now done and skinning can now commence! 

Friday, 25 September 2009
Aileron Ideas
I have two options for the ailerons. The first is similar to my Mick Reeves spitfire, with a hinge at the top of the surface and a ball joint in the middle of the moving surface.

The second option is to do away with conventinal model hinges and to incorporate a steel rod along the entire length of the aileron attached to the wing by 1/8 ply bearers. A control horn is then soldered to the steel bar within the aileron.

Thursday, 24 September 2009
Ailerons
Must admit to not being too happy about the ailerons for the model. They obviousley aren't scale but designed for functionality. I am thinking about re-designing along the lines of the Mick Reeves Spitfire I have.


Tuesday, 22 September 2009
Continuing the Fuselage
This week I have continued with the fuselage, cutting out the fuel tank floor and the wing saddles. The formers were all glued to the crutch ensuring that each was vertical first using a set square. Following installation of the formers a limited number of stringers were glued into place to ensure the formers stayed vertical. The wng saddles and the fuel tank floor were then glued into position. Before I install the remaining stringers I will be putting the elevator and rudder push rods in place.


The following photo is of my friend Dave's plane a Ziroli Bearcat. Slightly further ahead than mine, but then he did use a laser cut kit and it is his cellar!!

Tuesday, 15 September 2009
Crutch built
The crutch for the fuselarge is now built and the formers for the fuselarge are cut out. I built the crutch over the plan but with a layer of tracing paper between so that there was no glue damage to the plan.


All the formers have gone over the crutch really well and will be glued in place shortly. Once glued in place I will start adding the stringers.


Subscribe to:
Posts (Atom)


